Joining strips of binding on the bias makes your binding less bulky than if you butt them together on the straight grain. The binding itself is normally cut on the straight grain of the fabric (you only have to cut binding strips on the bias if you are binding curves or wavy edges). It is actually only in the joining of the strips where you sew and cut a 45 degree angle.
Cut the binding strips at the appropriate width; 2 ½” strips cut across the width of the fabric i.e. from selvedge to selvedge, is what is usually recommended for normal sized quilts. Cut off the selvedge at both ends of the strips.
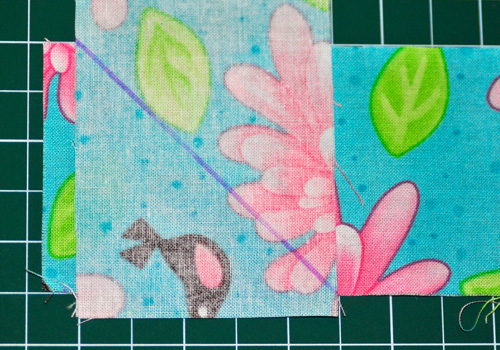
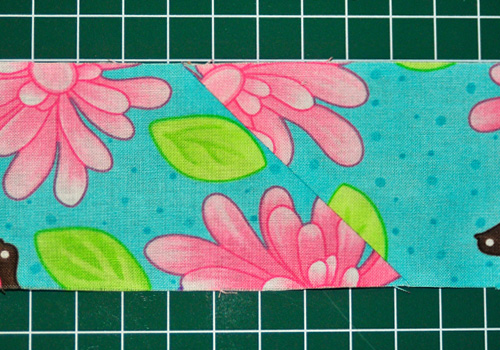
To join strips together, lay one strip right side up on a flat surface. Laying it on a cutting mat where you can line it up with the straight lines is a good idea. Take a second binding strip and lay it right side down on top of the first strip, and at right angles to it i.e. you can line it up with the lines going in the other direction as in photo 1.
It makes it easier to draw a stitching line if you overlap the corner by a few mm. Draw a line with a pencil or air erasable pen and ruler across the corner where the two binding strips intersect.
Sew across the drawn line and press.
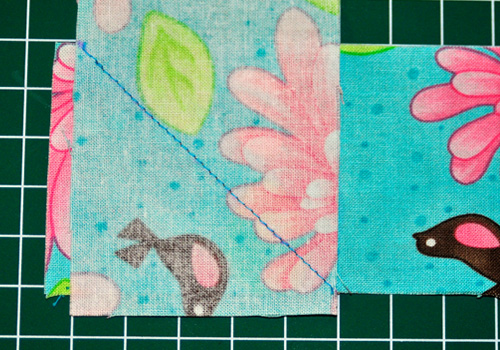
Trim off the corner ¼” from the seam line. Also trim off the “ears” – this will make it easier to sew the binding onto the quilt.
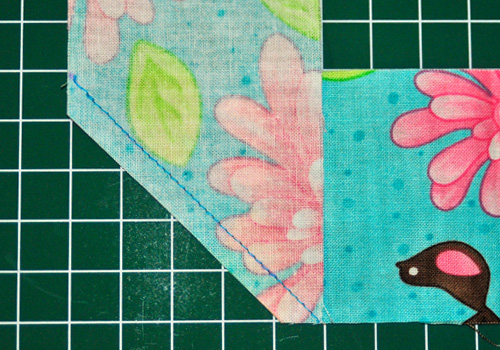
Press the seam open. This will further reduce the bulk of the join and make it less noticeable.
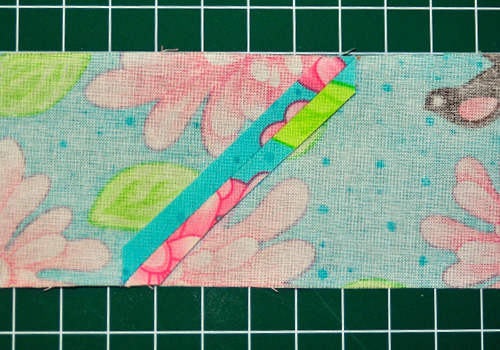
The finished seam is neat and flat. By the time the binding is attached to the quilt it will have been folded in half lengthwise twice, and the bulk of the seam will be spread over a 2 ½” length of binding.
In contrast, if the seam is butted together on the straight grain, the entire join will be enclosed in a ½” space of the binding, making it a very lumpy join.



4 Responses
Wow! Simple but effective! Thank you so much for a clear explanation.
Another great demo. Very clear.
I see it clearly now! Thank you so much !!!
A difficult job made easy with an simple and understandable explanation.
Thank you.