Quilters are known for being resourceful and I have noticed many things designed for other uses being hijacked for use in quilting, and to prove it, I’ve decided to share six of my favorites with you.
Some are because they are just really great for the purpose, but some are because they are cheaper, and hey, we can all use more money to spend on fabric, can’t we?
1. Freezer Paper:
Originally used before plastic bags were invented for wrapping food to put in the freezer, or for layering between frozen goods to keep portions separate.
Now we find it the perfect paper for cutting shapes for needleturn appliqué, and for cutting parts of small, one-off pieced blocks (e.g. in a “Dear Jane” quilt).
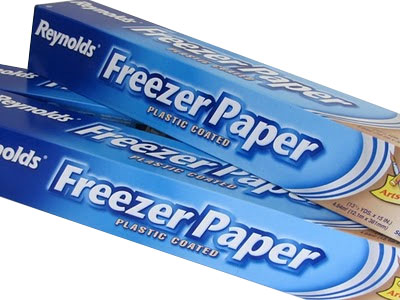 The paper is waxy on one side so trace the designs onto the other side and cut out; place the waxy side against the fabric and iron it and it forms a temporary bond with the fabric. Fabric can then be cut out with a seam allowance added. Shapes can be peeled off and re-used several times.
In America it can be bought at supermarkets, but in Australia it is generally only available in patchwork shops.
2. Baking Paper:
We all know this is what stops the cookies sticking to the tray. But it also stops all those lovely fusible products from sticking to the iron.
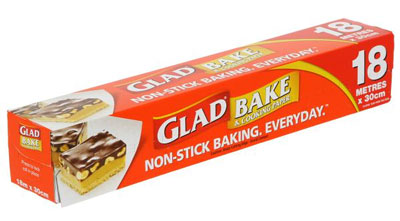 When using fusible webbing (e.g. Vliesofix, Steam-a-seam etc) for appliqué, or an iron-on stabilizer (Vilene, Pellon, Parlan etc) you can put a piece of Baking Paper on your ironing board to stop it sticking to the board, and another piece on top before you iron, and your iron will stay clean as well.
You can also assemble an appliqué, ironing it onto the baking paper piece by piece, and then peel off the baking paper and iron the entire appliqué onto the background at once.
3. Bicycle Clips:
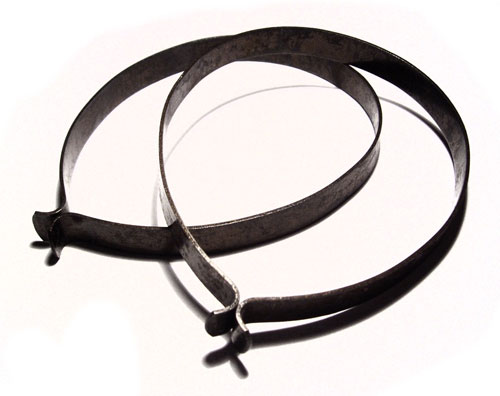
Quilting with a domestic sewing machine can sometimes be a challenge.
Quilters have discovered one way to control the large area of quilt is to roll it and slip a few bicycle clips (the sort cyclists used to use to keep their flappy trouser legs from getting caught in the chain) over the roll.
This will stop it unrolling, but it is still easy to slip the clip around and unroll it as you go.
4. Snap Hair Clips:
These are the ones little girls wear in their hair all the time, except they don’t need the little flowers and bows and other decorations on them.
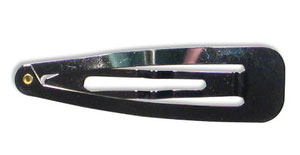 They are great for holding down the binding around the edge of the quilt, first as you sew it on, and then as you fold it over and sew it down later. Less pin-pricks in the fingers, and no dropped pins to find later!
5. Gardening gloves:
Yes I know you can buy special quilting gloves with grippy bits on the fingers, but I have found I can buy almost the exact same thing in the gardening department at half the price!
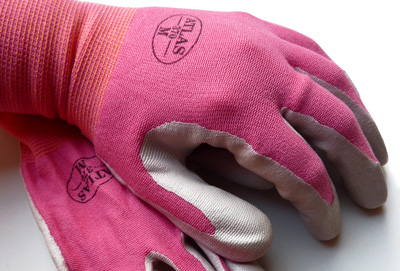 My favorites are the ones which are made of lycra so they fit nice and tight and they “breathe”, but they look as though the whole palm of the hand and fingers have been dipped in latex, which gives a super grippy finish.
I can get them in my favorite color (Pink), there is much less strain on my wrists and fingers and I can quilt for longer!
6. Templates:
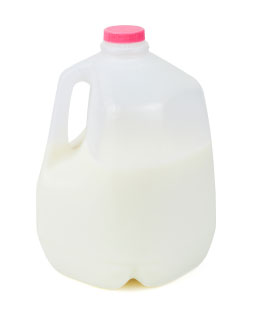 Our Grandmothers used cardboard, and we use template plastic, but have you thought of looking around for less expensive options?
Milk and juice often comes in straight-sided bottles which are transparent or semi-transparent, which are great for cutting small templates from.
Old X-Rays are also good for templates. And I’m sure we have all used bowls, lids and coffee cups for drawing circles!
I’m sure you could think of some other options too.
I would love to know what you use for quilting which was meant for something else.
Happy Quilting!


189 Responses
I went to a hair salon supply and bought flat hair clips to hold binding and other things. They hold well but are easy to move. I keep an old pillowcase handy for ironing gooey things; just put the piece inside to protect your board and iron. I’m going to have to try some of these other ones though!
I also use freezer paper for machine sewn names or notes. I write my message or name etc on the dull side of the freezer paper then iron it on to my quilt, cushion or journal cover top etc where I want the message to be! I then sew over the writing with a small straight stitch (1.5) when done the paper easily tears away when you pull it or use tweezers.
I use old cd’s to trace round corners on my quilts and as templates.
I drink ALOT of Crystal light. (The 2 quart size). So, I use the plastic containers the packets come in because they have lids for pins, clips, mechanical pencils safety pins ect.
Stitching and pressing is a must, but can be challenging when we travel. I use the flat cardboard inside of a fabric bolt, wrapped with some light batting, and topped with used cotton fabric. Anchor fabric with safety pins. This fits well into my luggage case with my travel iron and is so light. I love it.
I cut templates from the clear plastic lids on yogurt and hummus pots. Being see-through, they are fantastic for fussy-cutting fabrics as you can see exactly where to place them. Especially good for cutting circles for cover buttons.
I use the plastic zipper pouches that pillow cases & sheets come in to transport projects I want to work on when away from home. The large pouches that comforters come in are great for a whole quilt.
I use tiny pony tail bands to keep the bobbins from becoming thread spaghetti.
My husband brought me a magnet with a hole. I put it on a strip of fabric, and can lower it to find pins I cannot see or reach.
I use an old laundry drying rack to hold pressed fabric until I need to cut it, keeps it in sight and unwrinkled and holds a lot of fabric
The freeze or wax paper work great for patterns, just remember, waxed side down. That is what stick to the fabric, and can use more than once.
I use an emery board to smooth the edges of my cardboard templates , especially for my drunkards path template which need to fit together perfectly
I use the plastic bag from the cereal boxer once cleaned and dried they work great and you can even use pin to hold it in place.
Best thing ever–carpet cutting blades from hardware store fit rotary cutters. Way less expensive and virtually the same thing
When sewing a straight line in quilting (by machine) I use blue painters masking tape as a guide. The tape can be repositioned many times and leaves no residue.
I use the foam earplugs to put on the pins when basting my quilts.
Use the clinging Saran Wrap to draw your free motion design onto. Place it on the fabric. Sew along your lines and peel it off when you are finished. No lines or chalk to worry about marking you fabric.
Painter’s tape is cheaper than tiger tape for marking quilting lines. Cut it in half as you go with an x-acto to make it go further. Dollar store is great for this. Also, preschool coloring books and puzzles are great for simple applique designs and shapes. Dollar store again. Thrift stores and yard sales sometimes have wheelchairs for sale; if you see one with a tray, snap up the tray for a super light box for tracing. Get battery tap lights at the dollar store to use underneath and you can trace anywhere.
Love these, especially the Press n seal tip from Cynthia Yackel. Thanks everyone. My tip is to chekc back here often!
I use blue painters tape to mark lines for quilting. It is fast and leaves no residue on the quilt top.
My sewing machine sits on a piece of closed cell foam, less noise and I can stick pins in it. Another is my pin cushion is a round dish that mechanics use for small items like Screws as it has a strong magnet on the bottom. Also great for picking.up pins, scissors and such.
I already use freezer paper and the plastic milk bottles for templates – I got my husband to cut them all for me as he works with very small scale instruments so gets them spot on. I have been using paper clips for holding binding together but will definitely hunt down the hair clips as they’ll be muchbetter. Thank you for the tips ladies 🙂
Ladies, I have used the inside of the wrappers from printing, photocopy paper instead of freezer paper. Works well and is almost free if you work in an office etc.
Hi everyone! Thanks so much for all your comments! They are so interesting and it’s awesome how we can share all our knowledge and help each other! These have been so fun to read 🙂
The piece of plastic that forms the handle cut- out on a gallon milk jug sometimes is still stuck to container. Save it, smooth the edges with a nail file and it makes a great ” iron” for paper piecing.
If you have a smart phone or digital camera you can take a picture of your quilt as its placed on the floor, it has been a life saver for me . I can look on the camera to see if it looks balanced but more important as I think I’ll remember which sides gets sewn together when I’m at the machine I forget., sew I look at my camera and all is well : )
I use old cd’s for cutting circles, clear glass canisters for storing buttons and things, and a vintage steel tanker desk for a cutting and piecing table.
I uas a flat fishing tackle box to keep my sewing odds & ends in. I have one that has a handle and you would be amazed how much you can get in it. I go to visit my son who is in the Air Force and all I have to do is grab my box no need to pack my sewing it is always ready to go.
I use a large flat tackle box to keep all my sewing notions in. You would be amazed how much you can get in it. And it is always ready for a road trip.
I use toilet paper as a substitute for tissue paper for sewing delicate sheers and for rubber backed curtain fabric scraps to help them feed smoothly under the machine foot…. A life saver when you are using several different types of fabric. It just tears away from the stitching when you are finished.
Toothpicks for needle turn applique; half a wooden spring peg for ‘finge pressing seams;,
haemostats/forceps I used for stuffing bears years ago are great for turning long strip for bag handles, and a slice of pool noodle in the top of a large aerosol lid makes a great pincushion when traveling. The top will hold your toothpick, the hole your thimble, and the lid is for thread rubbish, and your thimble hen traveling.
I also use the plastic that is under bacon. I layer 2 percent 3 and cut them tape them together. Works great.
I use wooden clothes pins to hod my binding. Dirt cheap and work perfectly.
I made my own 2 ft x 4 ft ironing board by using a $30 costco telescoping table as a base and made a cover out of leftover batting pieces and $7 of ironing board fabric that I purchased locally. Love it .. and I saved $150
I keep an old Advil bottle with the child proof lid with my sewing supplies to put used needles and bent pins in, rather than putting them in the trash can, so no one gets stuck with the old needles and pins. When full get another empty bottle and throw the old bottle of needles and pins in the trash.
I have actually cut objects from my cricut machine and laminated them for use as templates. Also have used several different scrapbooking tools. Just use your imagine.
I asked my husband to help me cut out ‘found plastic’ for templets. Octagonal for Grandmothers Flower garden quilt. He took the task and did a wonderful job. This lite the fire under him. I had the squares cute to pin onto the patterns, but he decided to try a staple instead if pins. I made a few of the pieces folding the edges, tacking and removing the pattern. Works wonderful. Staple remover an the finished quilt got a Red ribbon at the county fair. Pieced and quilted by hand. Also. I wanted to do lots of quilting so instead of circling the octagon I chose to stitch from point to point. Made small diamond on the back.
Binder clips for holding binding is something I’ve found invaluable!
Toe spreaders for keeping bobbins tidy, old Ferrero rocher boxes for keeping notions together and the lids are fab if a sticky strip of magnet is placed underneath I can quickly drop pins and binder clips in and they stay put and can’t roll out easily (I’m clumsy and knock things over a lot)
Freezer paper is fantastic stuff, although I’ve never found it sticks a second time?
Frixxion pens are incredible, wish they did a white one as I often work with dark fabrics.
Thanks everyone for the amazing ideas!
I use a wallpaper seam roller instead of finger pressing or even occasionally ironing!
My tired old eyes hate to fight threading needle on my machine. It finally hit me that I could tie off my regular machine like I do when changing thread on my s e r g e r.
My biggest latest discovery are the gel pens by Paper mate. I use them to mark anything on fabric because they iron off. Cheaper than than any other marking method and works like magic and can be bought anywhere.
I use coffee filters for stabilizers when monograming my quilt blocks.
I use coffee filters as stabilizers for my quilt blocks when monograming.
If you have a smart phone set your photo to black/white. take a picture of your quilt to make sure that the dark colors of your quilt are adequately spaced. they make the red glasses for this but your smart phone will do the same thing for free!
I use empty toilet paper tubes to roll up my binding strip. Keeps it from tangling even if it falls to the ground. You could thread a string through it and hang it if that were a problem.
Wow! Im new to quilting and I’m just learning so much from you all. Thank you for sharing. 🙂
I use a lint roller (the tape type) to clean up. Works great on your quilt to remove all the loose threads. Removes all the little scraps fabric from your cutting mat. Use it to clean up your sewing table pins an all. The dollar store ones are great.
The thin plastic that comes in some bacon packages is thin and clear. It’s very easy to work with. I buy up old sheets and curtains etc at second hand stores to use in quilting. It Dan really save you.
I use a Mary Kay cosmetic bag with all the zip pockets for my sewing accessories and it’s just ready to go when I go to retreats and on sewing weekends to my daughter’s church group.
I save all hand soap remnants and use them to mark my quilts design for hand quilting. It leaves a sharp line and is shows up perfectly when used on dark fabrics. I also use a full bar of Ivory soap to run my quilting needles through. It makes the needle glide through the three layers with ease. I learned these tricks from my Aunt who was a seamstress.