Quilters are known for being resourceful and I have noticed many things designed for other uses being hijacked for use in quilting, and to prove it, I’ve decided to share six of my favorites with you.
Some are because they are just really great for the purpose, but some are because they are cheaper, and hey, we can all use more money to spend on fabric, can’t we?
1. Freezer Paper:
Originally used before plastic bags were invented for wrapping food to put in the freezer, or for layering between frozen goods to keep portions separate.
Now we find it the perfect paper for cutting shapes for needleturn appliqué, and for cutting parts of small, one-off pieced blocks (e.g. in a “Dear Jane” quilt).
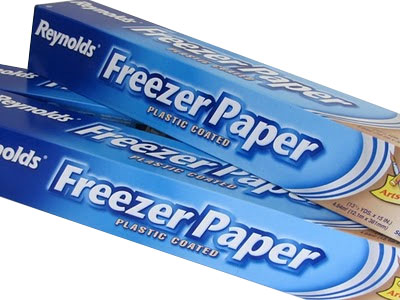 The paper is waxy on one side so trace the designs onto the other side and cut out; place the waxy side against the fabric and iron it and it forms a temporary bond with the fabric. Fabric can then be cut out with a seam allowance added. Shapes can be peeled off and re-used several times.
In America it can be bought at supermarkets, but in Australia it is generally only available in patchwork shops.
2. Baking Paper:
We all know this is what stops the cookies sticking to the tray. But it also stops all those lovely fusible products from sticking to the iron.
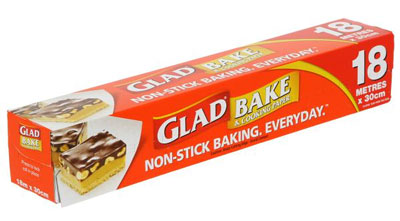 When using fusible webbing (e.g. Vliesofix, Steam-a-seam etc) for appliqué, or an iron-on stabilizer (Vilene, Pellon, Parlan etc) you can put a piece of Baking Paper on your ironing board to stop it sticking to the board, and another piece on top before you iron, and your iron will stay clean as well.
You can also assemble an appliqué, ironing it onto the baking paper piece by piece, and then peel off the baking paper and iron the entire appliqué onto the background at once.
3. Bicycle Clips:
Quilting with a domestic sewing machine can sometimes be a challenge.
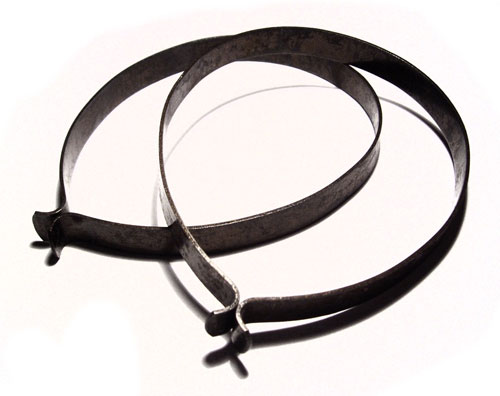
Quilters have discovered one way to control the large area of quilt is to roll it and slip a few bicycle clips (the sort cyclists used to use to keep their flappy trouser legs from getting caught in the chain) over the roll.
This will stop it unrolling, but it is still easy to slip the clip around and unroll it as you go.
4. Snap Hair Clips:
These are the ones little girls wear in their hair all the time, except they don’t need the little flowers and bows and other decorations on them.
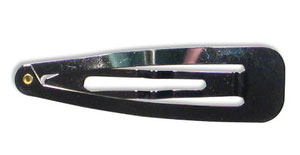 They are great for holding down the binding around the edge of the quilt, first as you sew it on, and then as you fold it over and sew it down later. Less pin-pricks in the fingers, and no dropped pins to find later!
5. Gardening gloves:
Yes I know you can buy special quilting gloves with grippy bits on the fingers, but I have found I can buy almost the exact same thing in the gardening department at half the price!
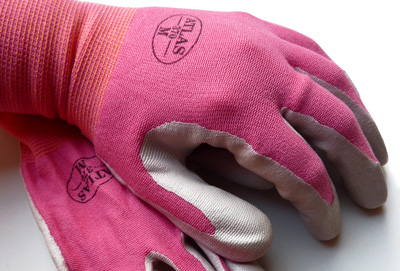 My favorites are the ones which are made of lycra so they fit nice and tight and they “breathe”, but they look as though the whole palm of the hand and fingers have been dipped in latex, which gives a super grippy finish.
I can get them in my favorite color (Pink), there is much less strain on my wrists and fingers and I can quilt for longer!
6. Templates:
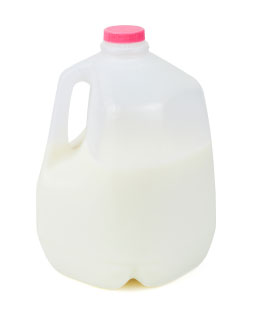 Our Grandmothers used cardboard, and we use template plastic, but have you thought of looking around for less expensive options?
Milk and juice often comes in straight-sided bottles which are transparent or semi-transparent, which are great for cutting small templates from.
Old X-Rays are also good for templates. And I’m sure we have all used bowls, lids and coffee cups for drawing circles!
I’m sure you could think of some other options too.
I would love to know what you use for quilting which was meant for something else.
Happy Quilting!


189 Responses
I have used bamboo BBQ skewers to help sew finicky small pieces. You can steer the fabric without getting close to the sewing machines needle.
I just pieced my first quilt, tacked it and put binding. It is not a normal quilt aa I cut the pieces from a Marine uniform shirt and cam jacket retaining names, pickets and patches from the garments. There are other unique points also and I can not believe I have completed it. It was a request from my mom who just passed. She requested it for her youngest grandson. Now that I have accomplished this I am excited to try other quilting projects. The great ideas from all you ladies inspire me to keep thinking and working ‘out of the box’. Thanks!
I just pieced my first quilt, tacked it and put binding. It is not a normal quilt aa I cut the pieces from a Marine uniform shirt and cam jacket retaining names, pockets and patches from the garments. There are other unique points also and I can not belive I have completed it. It was a request from my mom who just passed. She requested it for her youngest grandson. Now that I have accomplished this I am excited to try other quilting projects. The great ideas from all you ladies inspire me to keep thinking and working ‘out of the box’. Thanks!
Pipe Cleaners – a package of 50 is only a dollar or so at the dollar store!: Cut in half. Thread your bobbin and matching thread onto it. fold over the ends and they are ready to store. You always have a matching bobbin and thread handy.
I use a new toilet bowl brush to pick up the little threads on my carpet under my sewing table. I also use those magnetic dishes sold at the auto parts store for my pins. They are deeper than the sewing ones and hold more pins.
I love all these great tips, I’ve been doing patchwork for about 15 years but there is always something new to learn every day, thank you everyone for sharing.
I find all the comments very interesting and have used many of the tricks suggested. I do machine quilting on my regular sewing machine. Lots of fun. Straight line between clobks is easy, but when you want circles some help is needed. So, I use the cap of a 1 quart canning jar. When making your circle always use a washable pencil or pen. The circles are fun as you can make any design you want. I have made animal designs using different size caps. Try Micky Mouse for an infant quilt. I don’t use plastic for templates. I am 88 years old. As you know skin become thinner as you age. Plastic cuts old fingers very quickly. Sorry to blow your suggestiions, but must preserve my skin for another day.
I use sand paper for templates. It grips very well to the fabric, and seldom moves around. My mom used to use them.
Prisma colored pecils. I’ve marked all my quilts with them, and they have all washed out. Short embroidery needles for quilting are nice and tiny with a longer eye. Command hook on side of sewing machine to hold small pair of scissors. Nonskid shelf liner to keep sewing macine where I want it, without migrating. Child benches for stuff, 2 stacked behind sewing machine. Tiny silver curtain hook clip to hold bag of prewound bobbins with scissors on command hook. Small barbs pipe cleaners from tobacco shop for cleaning. Nail cleaning brush on ironing table to remove little threads in a sweep.School glue for basting. Mason jars of all sizes for storage. Lits mire too.
My cell phone and tablet for patterns, instuctions, shopping for still more fabric, and great websites like this.
Used dryer shgets as stabilizer
Mr Clean sponges and electric stove top cleaner wipes to clean iron
A narrow, hokeless doir, covered in ugly blankets and ironing board silver fabruc by the yard, stapled to make a long, wider ironing surface over 2 bar stools, 2 drawer cabinets, or 2 other level supports. Left both ends free, painted them, to hokd stuff. One end has a child bench on it to store even more stuff, lije a lamp higher for better light. Spectrum correct/daylight energy efficient bulbs to see colors correctly.
I do use the freezer paper trick and I also put the no skid shelf liner under my sewing machine foot to keep it in place, works much better than the plastic thing I spent about $20.00 on AND you can sometimes find the shelf liner at the dollar store or 99 cent store. Don’t care for the milk carton plastic templates, difficult to get a clean edge. I put a layer of tin foil on my ironing board to prevent the glue on appliques from migrating there and after I’ve got everything in place, a clean white damp hand towel on top so the applique does blemish or scorch.
I live in farm country and purchased a large bottle of Orvus Paste for washing quilts from the feed store for the same price as a tiny jar from the quilt shop.
Faye PFC (Professional Fabric Collector)
I just bought a pair of garden gloves with the grippy texture at Dollar Tree. Hard to beat that price! 😉
I was securing tomato plants to trellis with green velcro-like garden tape. I realized it works with my quilting supplies for securing cords, my rolls of stabilizer, iron-on backing, parchment pattern paper and even small rolls of fabric as one side is soft and protects the material. I even keep some with me when I travel to workshops.
The dollar store has almost clear plastic cutting mats perfect for applique templates also lids off coffee cans for colorful ones
Some good tips here and although I’ve been a quilter for 30 years, there is always something new to learn.
Marie
A handle with suckers to put on the wall for disabled people wanting to get out of the bath or up from the toilet! I saw them at the quilt shop and did not buy as too expensive but on going to the MItre10 store and the Bunnings saw the exact same thing and I paid $19.99 for the big one! Went home, put it on my big long ruler and hey presto, no more trying to get to the very end and slipping, steady as a rock, hahaha! You can also get the knobs and come in a packet of two and they suck unto the plastic like magic and handy to hold with my arthritic hands!
When embellishing a wall hanging if beads have spilled onto the carpet use a large spoon to scoop them up. Works like a charm.
I use bar soap (hotel/motel size) for marking fabric. I shave down a narrow side for my use.
Make a mistake, just use a damp cloth, or a brush to erase it.
I use magnetized screw driver to unscrew plate to clean out machine once a month. Great aid. Use large sandwich bags to keep pieces together after cutting out. Wash yr cutting month every few months in the bath with shampoo to keep it in good condition. Will last forever. Heals the damage. Warm water. Glue magnet to end of broom…top end to pick up pins easily from the floor.
I have used cookie cutters for appliqué templates on my baby bibs and blankets.
Oven liners from the b big box lumber supply (Menard) withstand high hat and can be used for pressing applique. They are less than $2.
Oven liners from the big box lumber supply can withstand high temps to 500 degrees and can be used to press applique. They are under $2.
As a scrap quilter, organization is necessary. I rinse out the 1 pond salad containers which are clear, and use them to store strip by size. I p-touch the size on the container, and you can scan the colors at a glance. I have an very old zipper roller that is wooden, and it’s a great seam presser.
Don’t buy those swiffer duster sheets for the floors. Instead, a scrap strip of batting cut to fit the head works beautiful, and really hold the dirt/
I’m new to quilting I love all the tricks.This is going to help me out a lot.Thank you very much
I use bobby pins to hold my binding in place.
I use white styrofoam insulation 2 inch thick sheets. One sheet I use as my design wall to hold/arrange my quilt blocks. Another sheet I cut in half then cut one of the halves to my desired height. I use that to pin my pieces when doing art quilts, so I don’t lose them. I also pin my small pattern pieces, or pieces of fabric until I’m ready for them
Thank you all for all the good tricks. Alway nice to learn new ones. Happy New Year everyone! Keep up the good work. Gotto go back to my quilt now.
First Aid bandage tape is great on the back of templates, or rulers, helps them to grip fabric and keep from slipping; can find it at dollar stores.
Slivers of soap to mark dark fabric. My hubby’s old dive weights for pattern weights.Cosmetic eyebrow shaper shavers for seam rippers.Dollar store manicure scissors for cutting the tiniest stitches.
An old, popped balloon; I use it to help pull my needle through thicker mterial. Works beautifully!
Loved your suggestions. I picked up an used stainless steel dental tool from my dentist. I love it. One end is a curved end and the other is straight. I use the straight end as a stiletto. It has so many uses. My previous stiletto was an orange stick used for manicures! Look forward to your future blogs
I use a grapefruit spoon to close my pins. The serrated front is perfect for
Holding the pin while closing it.
This is not so much of a sewing tip but rather clever and a bit comical. When I owned my Quilt Shop I had a customer that brought a Cereal Box in to take her fabric home. She said it was the kind her husband didn’t like and enabled her to sneak in as much fabric as she wanted.
I’m sure we’ve all experienced our husbands commenting on buying more fabric! LOL
Read where someone uses shelf paper to prevent migrating. Well, my work space is so small I need to get my machine to “migrate” easier. I have a large oval of plastic canvas (the kind you use for needlepoint) Under my machine and can easily move it to the back of my table . And it doesn’t migrate on it’s own when I’m not looking
KFC puts a pointy stick in their corn on the cob. Those are my “bamboo stiletto” I use on every thing. It’s small and tasty, LOL
I use the little plastic thing that some times is left in the milk carton in the handle part as an iron. When I have a small seam to press open I just rub it ( like an wooden iron or wooden press). Saves time of going to the ironing board or heating up an iron for just one seam. I found mine at the grocery store where they sell the milk. Sometimes they are on the floor!! I have Picked up more than one and keep them by each of my sewing machines!!
I made a large 7 shaped helper with a loop at the end, out of a wire coat hanger stuck it on the back of my machine to hold the thread when using a large cone of thread ,works like magic ,,
I use my needle nose jewelry pliers to pull up bobbin threads from under the foot.
When I need to cut several WOF strips all the same size I mark the underside of my 24″ x 6″ ruler with two pieces of specially cut blue painters tape. Take a roll of blue painters tape and cut thru (with an exacto blade or other sharp blade or knife) several layers of the tape (4-6 layers) ; peal all the layers off the roll at the same time all the way around the roll; now cut this long strip in 2 pieces and tape them onto the underside of your ruler along the same horizontal line (i.e. 2 1/2″). Once you have this prepared and have squared up the starting edge of the fabric you wish to cut from, bump the edge of the blue tapes up to the straight edge of fabric and proceed to cut your strips. Use the blue strips over and over till they don’t stick, then make some more.
Head for Lowes or Home Depot and pick up a large T square, a 6 foot metal ruler for your cutting table, a small level, and some smaller sizes t-squares. Invaluable!
knitting needles for storing thread and matching bobbins, I can usually put 3 or 4 colors on one needle, use a stitch holder to keep them on.
A wallpaper roller for quick seam pressing. Plastic one works fine but hope to find an old wood one at a yard sale.
Cut the clips from pants hangers that you get from the store when you buy clothes to use as binding clips when putting your bindings on your quilts.
coffee filters work great as a stabilizer.
One of those plastic snow sled sheets on my work area to free motion quilt on my regular machine…just cut out the area under your needle, drop your feed dogs and use low tack tape to tape down the edges of the sheet. Whee!
My cats are finally contributing to my quilting – the large plastic containers of kitty litter are a great source of template plastic. One container gives you two 7″ x 8-1/2″ pieces. The plastic from the litter container is a little thicker than milk bottle plastic. I use the milk bottle for hexagon piecing (paper piecing). Punch a hole in the center and the hexagon piece pops right out with a crochet hook when you’re ready.
Templates can be made from the small liners that come in a package of bacon. Just make sure you wash them with soap and water beforehand, to remove the grease from the bacon!