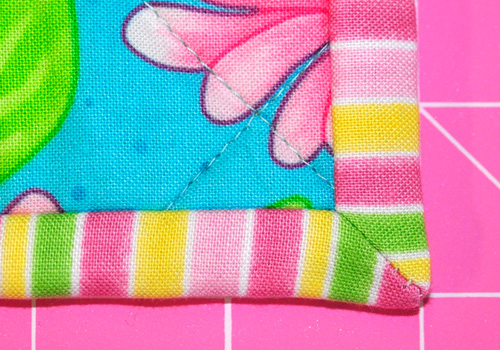
Stitched, mitered corners are very useful when you want the binding on adjacent sides of a quilt to be different colours, and you want them to join neatly at the mitered corner as in the photo below.
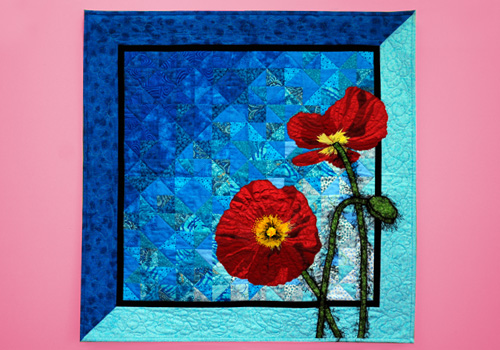
In fact, we normally use this method of binding on all of our projects because we like the way stitched, mitered corners look: very accurate and square. It would be very difficult to get the same precise look with continuous binding.
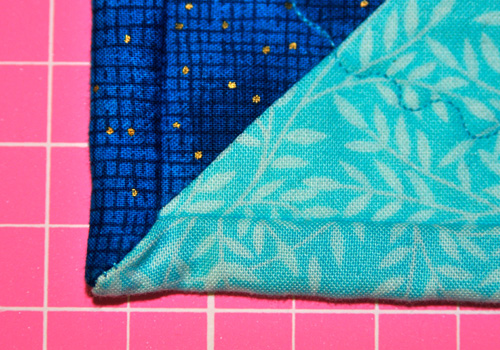
The usual width to cut the strips for this binding is 2 ½”, although you can cut the strips wider or narrower if you prefer. With stitched mitered corners the technique is exactly the same whatever the width of the binding.
Cut four strips which are approx 4” longer than each of the sides of the project. If you need to make longer strips to fit the project, we recommend joining extra strips of fabric on the bias to reduce the extra bulk of the seam.
(Click here to ‘Learn how to join fabric strips on the bias’)
Step 1:
Take the binding strips and fold in half lengthwise with wrong sides together and press. Align the first binding strip with the corresponding side of the quilt, centering it so that it extends past each end of the quilt by an equal amount.
Using a ¼” seam, start stitching ¼” from the top of the quilt, and finish the seam ¼” before the bottom of the quilt (see diagram 1). Backstitch at each end to secure.
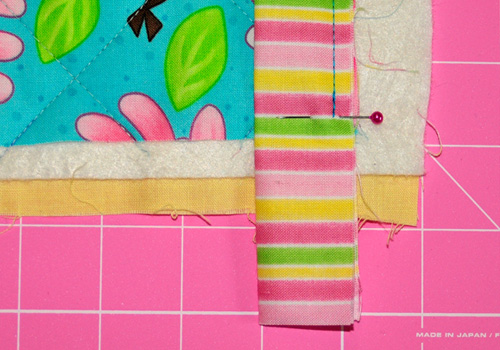
Repeat for the other side, and the top and bottom edges. Make sure to pull the previous binding strip out of the way so it is not caught when sewing. The rows of stitching should meet neatly in the corners.
Step 2:
With the quilt right side up, start working on the right hand bottom corner (this means the bulk of the quilt is away from you, not in your lap). Make sure the horizontal strip of binding extends straight out to the right, and the vertical binding is folded out to the right underneath the horizontal strip i.e. to make a 90 degree angle.
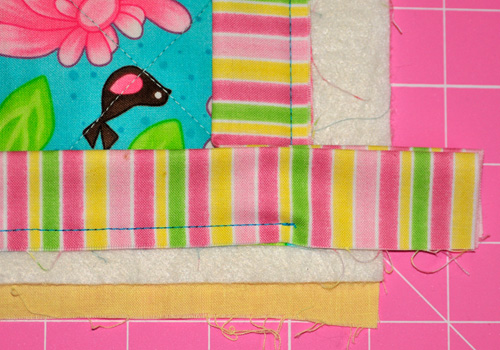
Lay the right angle corner of a quilting ruler over the binding at a 45 degree angle, lining up the edges of the ruler with the end of the horizontal seam, and the point where the vertical seam disappears under the horizontal binding. Make sure the point of the “V” is positioned halfway between the horizontal seam and the folded edge of the binding. Mark around the “V” shape of the corner of the ruler on the binding with a pencil or erasable pen.
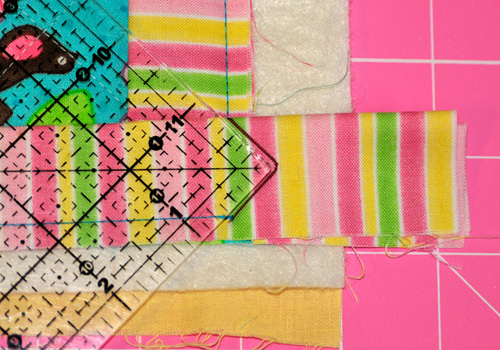
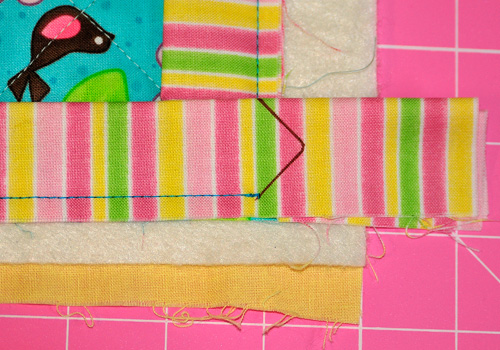
Fold the quilt diagonally, right sides together at the corner, with adjacent bindings lying on top of each other. Carefully align the folded edges together. Using smaller stitches than normal, sew on the marked “V” line, backstitching at the beginning and the end.
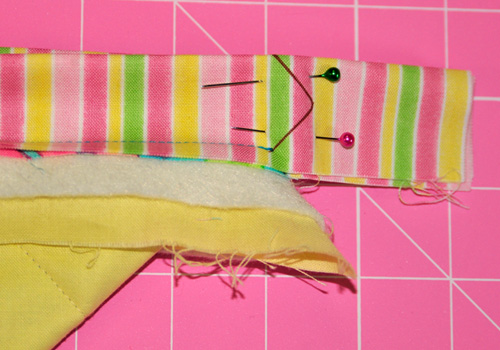
Rotate the quilt and repeat for the other three corners.
Trim around the ‘v’ seam and cut off the point close to the stitched line. Cut the excess fabric and batting off by trimming the seam allowances to 3/8 in (1 cm) and turn the corners right side out (a point turning tool is useful for this).
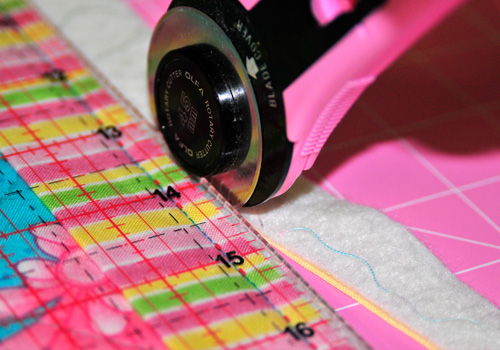
NOTE: You will need to leave a larger seam allowance if you have cut your binding wider or a smaller seam allowance if binding is narrower.
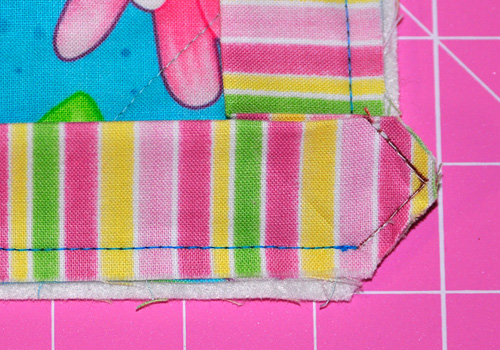
You can attach a hanging sleeve at this point. (Learn ‘how to attach a hanging sleeve’ in this tutorial)
Step 3:
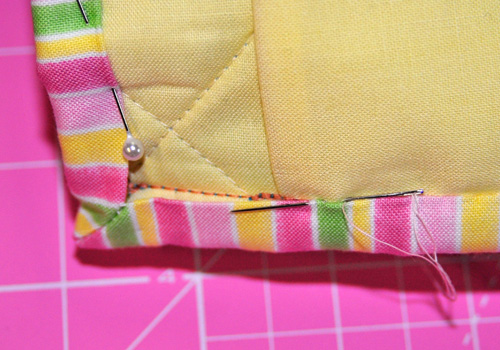
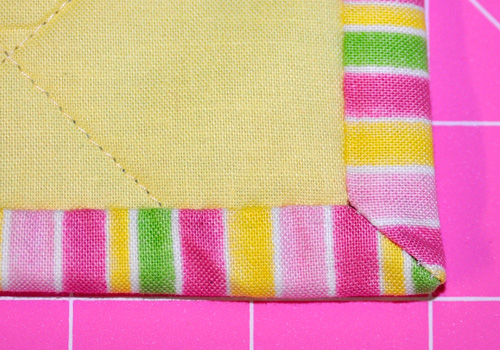
Pin and slipstitch the folded edge of the binding to the back of the quilt. Make sure the binding just covers the previously stitched seam line. If you follow this line your binding will be very straight. To make the stitches less noticeable, we like to use thread that matches the color of the binding.



7 Responses
just found you through google this morning….i’m making a quilt with two colors of binding & this is exactly what i needed to know!!! thanks so much!! linda
I’ve been struggling with this for a while. You made it so easy to follow. Thank you 🙂
Thanks for this tutorial; need it for a quilt I’m currently working on.
thank you , I’ve been looking for someone , (sewing teachers ) to explain this .
Going to try this as I have been struggling. Doing quilt with 2 colours each side and 3rd colour to be the square at the corner. Border 1″.
Found you by using excellent search terms! I had a shortage of the original main fabric of my quilt (tree of life variation) and I could not make continuous bindings. Your instructions allowed for four beautiful mitered corners on the quilt binding. Thank you very much!
perfect, worked great with one color on two sides and another color on the other two sides.